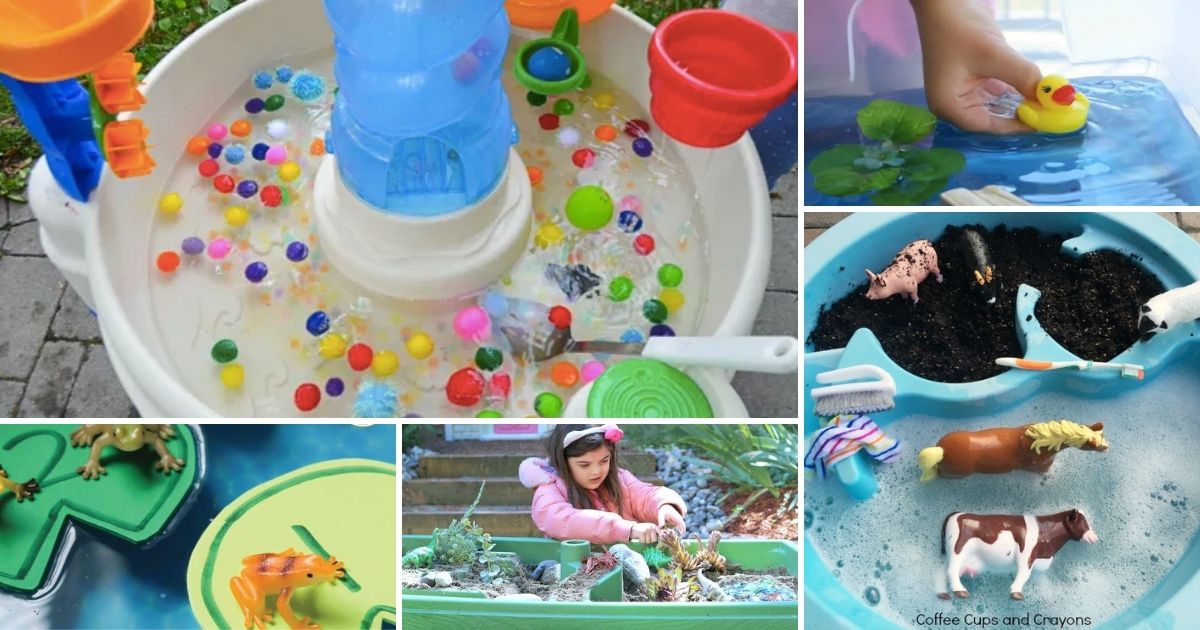
Step into a world of boundless imagination and boundless creativity with themed transformations. In this article, we will demonstrate how to transform a basic water table into a captivating DIY creation that will captivate and engage children for hours on end. Let your creativity soar as we walk you through the process of crafting your very own themed water play table. Prepare to infuse your backyard with a touch of magic and wonder with this exciting and fun project!

Exploring the Advantages of DIY Water Play Tables
DIY water play tables offer a plethora of benefits for children, including sensory exploration, cognitive development, and endless hours of amusement. By constructing your own customized water play table, you are providing your child with a unique and stimulating play experience that promotes their overall development. Let’s delve into the specific advantages of DIY water play tables.
Sensory Exploration
Water play is a fantastic way for children to engage in sensory exploration. By incorporating different textures, colors, and objects into the water table, children can use their senses to discover and learn about the world around them. DIY water play tables allow you to customize the sensory experience for your child, making it even more engaging and educational.
Cognitive Development
DIY water play tables also promote cognitive development in children. As they play and experiment with the water and various objects, they are developing their problem-solving skills, hand-eye coordination, and spatial awareness. By adding themed elements to the water table, you can also encourage imaginative play and storytelling, further enhancing their cognitive abilities.
Endless Entertainment
One of the greatest advantages of DIY water play tables is the endless entertainment they provide for children. With a variety of objects and themes to explore, children can spend hours playing and creating their own adventures. This not only keeps them engaged and occupied, but it also allows them to develop their creativity and imagination.
Crafting Your Own Themed Water Play Table
Now that we’ve explored the benefits of DIY water play tables, let’s dive into the process of creating your own themed water play table.
Gather Materials
The first step is to gather all the necessary materials. This may include a water table, various containers and objects, waterproof toys, and any themed elements you want to incorporate.
Choose a Theme
Next, choose a theme for your water play table. This could be anything from a pirate adventure to a fairy garden. Get creative and involve your child in the decision-making process.
Assemble and Decorate
Assemble your water table and add any decorations or themed elements. You can use waterproof stickers, paint, or even create your own themed objects using materials like cardboard and paper.
Fill with Water and Objects
Fill the water table with water and add various objects and containers for your child to play with. You can also add food coloring or scented oils to enhance the sensory experience.
Let the Fun Begin!
Now it’s time for your child to explore and play with their new themed water play table. Encourage them to use their imagination and create their own stories and adventures.
In conclusion, DIY water play tables offer a multitude of benefits for children and are a fun and engaging project for parents to undertake. By customizing the experience for your child, you are providing them with a unique and stimulating play opportunity that promotes their overall development. So why not dive in and create your own themed water play table today?
Creating a Unique Water Play Experience for Your Child
Water play is a fun and engaging activity for children of all ages. Not only does it provide a refreshing break from the summer heat, but it also offers a multitude of developmental benefits. By building your own customized water play table, you have the opportunity to tailor the design to your child’s interests and preferences. This hands-on activity allows children to engage in creative play while fostering important skills such as problem-solving, fine motor coordination, and communication.
Personalizing Your Water Play Table with Themes
One of the most exciting aspects of crafting your own water play table is the ability to incorporate personalized themes. Instead of purchasing a generic table from the store, you can create a unique and meaningful play experience for your child. Whether they love animals, outer space, or princesses, you can easily customize the design to reflect their interests. Add stickers, decals, or small figurines to create a themed play experience that will spark your child’s imagination and ignite their sense of wonder.
Enhancing Creativity and Imagination
By incorporating themes into your water play table, you are not only making it more visually appealing, but you are also enhancing your child’s creativity and imagination. As they play with their favorite characters or objects, they will come up with new and imaginative scenarios, allowing them to explore their creativity and develop their storytelling skills.
Promoting Fine Motor Skills and Problem-Solving
In addition to fostering creativity, a personalized water play table also offers opportunities for fine motor skill development and problem-solving. As children manipulate the water and objects in the table, they are strengthening their hand-eye coordination and dexterity. They are also presented with challenges and obstacles, encouraging them to think critically and come up with solutions.
Creating Lasting Memories
By creating a unique water play experience for your child, you are not only providing them with hours of fun, but you are also creating lasting memories. As they grow older, they will look back on these moments with fondness and nostalgia, remembering the special themes and designs that were tailored just for them.
In conclusion, building a personalized water play table for your child is a fun and rewarding activity that offers a multitude of benefits. By incorporating themes, you are not only making it more visually appealing, but you are also enhancing their creativity, fine motor skills, and problem-solving abilities. So why settle for a generic table when you can create a one-of-a-kind play experience for your child? Start crafting your own water play table today and watch your child’s imagination come to life.
Creating Your Own DIY Water Play Table: A Step-by-Step Guide
Are you looking for a fun and creative way to keep your kids entertained this summer? Look no further than a DIY water play table! Not only is it a great way to beat the heat, but it also provides endless opportunities for imaginative play. Follow these step-by-step instructions to create your own water play table using simple materials and a little bit of creativity.
Gather Your Materials
To get started, you will need a few essential materials such as a plastic storage container, PVC pipe, connectors, water toys, and waterproof sealant. These materials can easily be found at your local hardware or home improvement store. You can also repurpose items you already have at home, such as an old storage container or PVC pipes from a previous project.
Assemble the PVC Pipe Frame
The first step is to assemble the PVC pipe frame that will serve as the base for your water play table. Cut the PVC pipes to the desired length and use connectors to create a rectangular frame that fits the dimensions of your storage container. This frame will be used to support the edges of the container and keep it in place.
Secure the Frame to the Container
Once the frame is assembled, use waterproof sealant to secure it to the edges of the storage container. This will ensure a watertight seal and prevent any leaks. Make sure to let the sealant dry completely before moving on to the next step.
Add Water and Toys
Now comes the fun part – filling the container with water and adding toys! You can use any water toys you have on hand, such as plastic cups, funnels, and water squirters. For a more elaborate design, consider adding water pumps, fountains, or ramps for added excitement. Let your imagination run wild and create a unique water play experience for your kids.
Get Creative with Themes and Transformations
To keep things interesting, you can change up the theme or design of your water play table. For example, you can add food coloring to the water for a colorful sensory experience, or use different types of water toys to create a pirate or mermaid-themed play table. The possibilities are endless, so don’t be afraid to get creative and switch things up!
In Conclusion
Creating your own DIY water play table is a fun and easy project that will provide hours of entertainment for your kids. With just a few simple materials and a little bit of creativity, you can create a unique and exciting water play experience right in your own backyard. So why wait? Gather your materials and get started on your DIY water play table today!
Unleash Your Creativity: How to Make a Unique Water Play Table
The possibilities for a water play table are endless. Whether you want to create a tropical paradise or a whimsical underwater world, let your imagination guide you. With a little creativity, basic materials, and a lot of love, you can craft a one-of-a-kind water play table that will provide endless hours of joy and fun for you and your little ones. So, let’s dive in, get crafty, and watch as your DIY creation transforms into a magical playtime experience. Happy crafting!
Unleashing Your Imagination
When it comes to creating a water play table, the only limit is your imagination. Think about what your child loves and what themes would excite them. Maybe they are obsessed with pirates, or they dream of being a mermaid. Use these interests as inspiration for your design.
Gather Your Materials
To get started, you will need some basic materials. A plastic storage bin or a large plastic container can serve as the base of your water play table. You can also use an old sandbox or a discarded baby pool. Other materials you may need include PVC pipes, pool noodles, plastic toys, and waterproof paint.
Let the Crafting Begin
Now that you have your materials, it’s time to get crafty. Start by painting the base of your water play table with waterproof paint. You can use bright colors to make it more appealing to your child. Next, use PVC pipes and pool noodles to create a water maze or a waterfall. You can also add plastic toys, such as boats or sea creatures, to enhance the theme of your play table.
Add Some Fun Features
To make your water play table even more unique, consider adding some fun features. You can attach a water sprayer or a water wheel to the table for added excitement. You can also incorporate a sand area or a bubble station for more sensory play. The possibilities are endless, so let your creativity run wild.
Make It Educational
A water play table is not only fun but also a great learning tool. You can add educational elements to your design, such as numbers, letters, or shapes. You can also use the water play table to teach your child about colors, cause and effect, and even science concepts like buoyancy and displacement.
Transforming into a Magical Playtime Experience
As you put the finishing touches on your water play table, you will see how your DIY creation has transformed into a magical playtime experience. Your child will be delighted to explore the different features and themes of their new play table. And the best part is, you can always switch things up and create a new design whenever you want.
In Conclusion
Creating a unique water play table is a fun and rewarding experience. With a little imagination, some basic materials, and a lot of love, you can craft a one-of-a-kind play table that will provide endless hours of joy and fun for you and your child. So, let your creativity flow, and watch as your DIY creation becomes a magical playtime experience. Happy crafting!

